A MicroPython webserver framework for the Pico W with a captive portal for wireless network login
Quickstart Hold BOOTSEL & plug in Pico W
git clone https://github.com/cfreshman/pico-fi && cd pico-fi
python3 build -a --packs remote-repl
Then connect to
w-pico(password:pico1234)
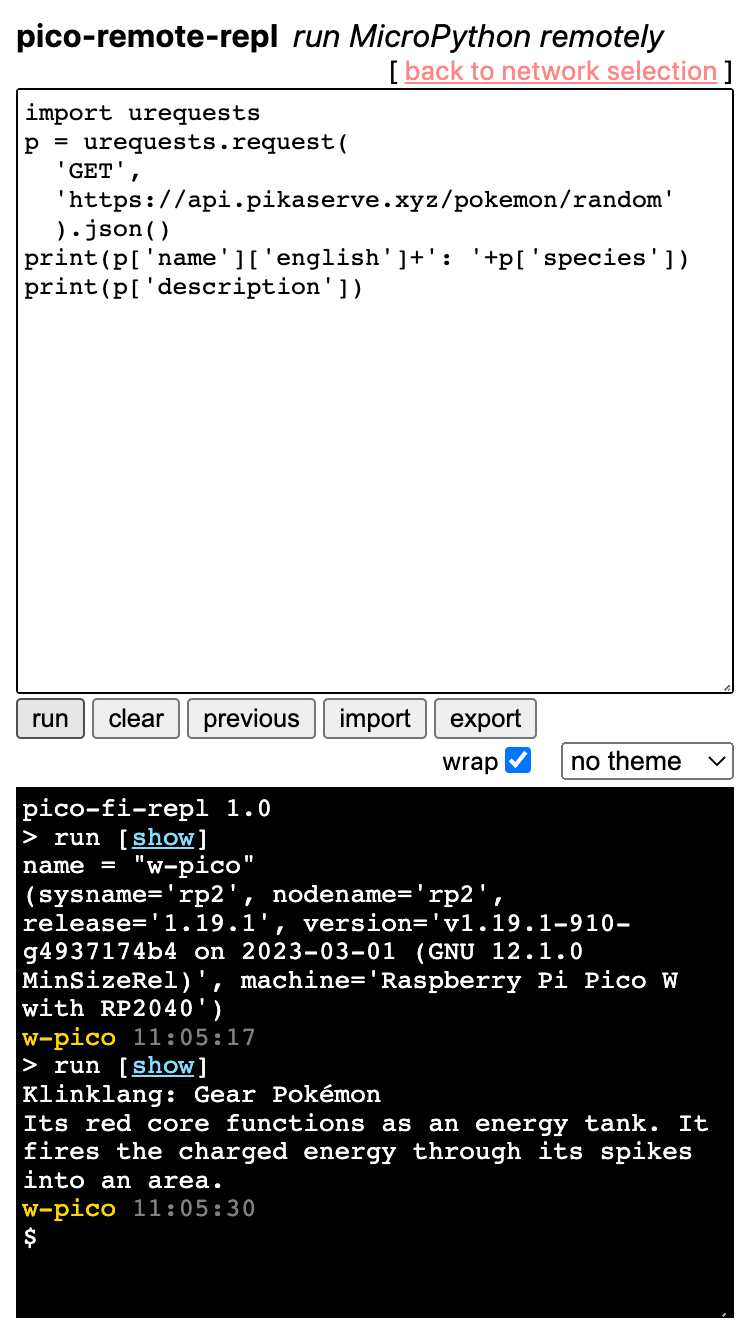
See packs/remote-repl for examples
| Network Login | Landing | --packs remote-repl |
|---|---|---|
 |
 |
 |
from machine import Pin
import pico_fi

# Connect to the Pico W's network:
app = pico_fi.App(id='w-pico', password='pico1234')

# (on-board LED will be on if started successfully)
led = Pin('LED', Pin.OUT)
@app.started
def started(): led.on()

# Wait for the login screen to appear
# Once logged in, you'll see a button to toggle the LED
@app.route('/led')
def toggle_led(req, res): led.toggle()
@app.route('/')
def index(req, res): res.html("""<button onclick="fetch(`/led`)" style="font-size:20vw">TOGGLE</button>""")

app.run()
Weighs 76K - 156K depending on configuration, supporting minified apps up to 774K
(2000K Pico W flash storage - MicroPython (1150K) - pico-fi (76K))
- Connect the Pico to internet with your phone
- Serve HTML from the Pico
- Handle HTTP, WebSocket, and DNS requests
- Persist state on the Pico with provided get & set APIs
- Define new 'packs' for custom routes and behavior:
Basic example - packs/hello-world
Toggle LED - packs/led-toggle
Web console for your Pico - packs/remote-repl - Automatically build, minify, and sync changes to the Pico
python3 build --packs hello-world,remote-repl --minify --sync --watch
Hardware
- Pico W
- USB to Micro USB data cable
- LED (optional - defaults to on-board LED)
Software
pico-fi now installs the required software (MicroPython and rshell) for you
- Plug in your Pico W while holding the BOOTSEL button
- Download pico-fi & build
This will automatically install MicroPython/rshell and start pico-fi on your Pico
git clone https://github.com/cfreshman/pico-fi
cd pico-fi
python3 build --auto
See build for options or run
python3 build -h
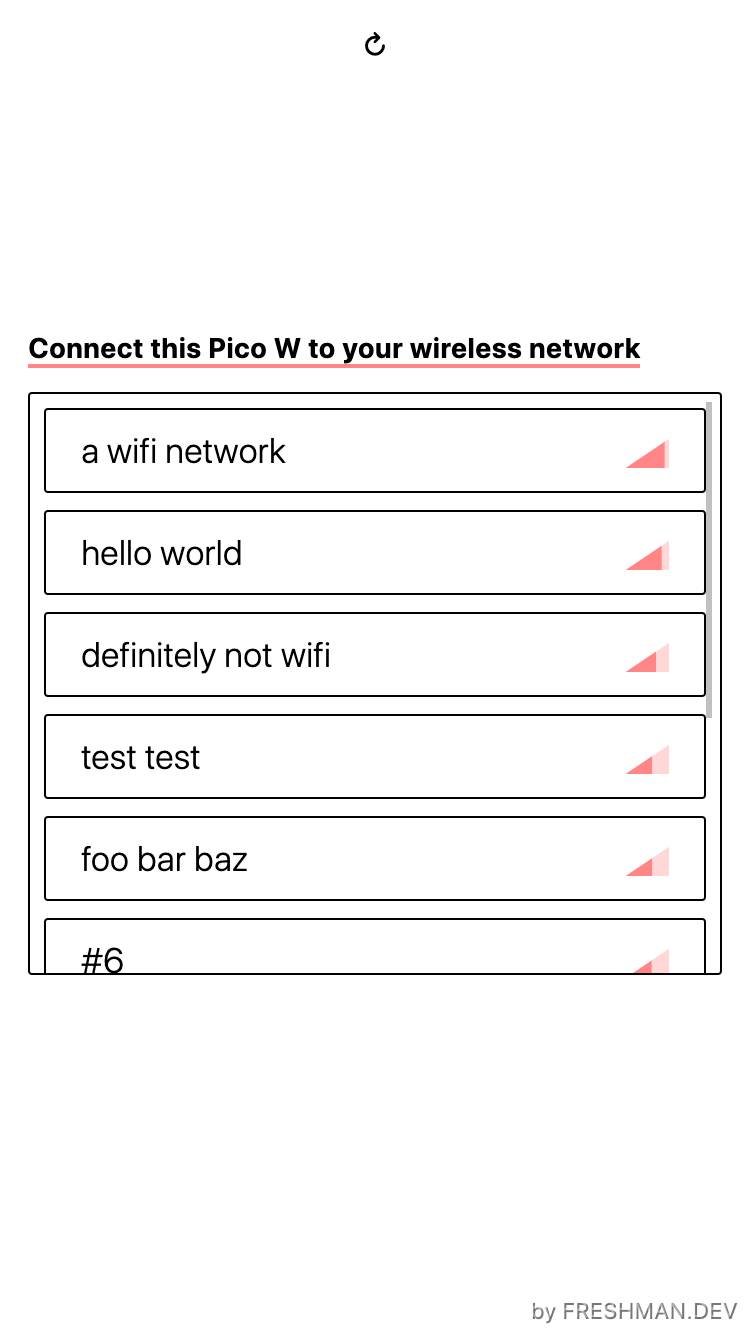
You should see a new w-pico wireless network appear (password: pico1234). Connect to this network with your computer or smartphone. If the portal doesn't open automatically, try opening http://192.128.4.1/portal. This may take a minute - the Pico is doing its best.
Alternatively, specify the network credentials at build time:
python3 build -a -n "network:password"
Edit the network name/password or add functionality in main.py, HTML in public/index.html
If your main.py grows too complex, split into separate concerns under packs/ and include each in the build: python3 build -a pack-a,pack-b,pack-c. Or build without minifying for accurate stack trace line numbers: python3 build -ws pack-a,pack-b,pack-c
See packs/hello-world for a simple showcase of pico-fi features
Note: prefix non-index.html files with the pack name, like cards-icon.png, because all files are built into the same base directory
- A multiplayer chess/checkers app anyone in the area can connect to
- Publish sensor data with MQTT https://www.tomshardware.com/how-to/send-and-receive-data-raspberry-pi-pico-w-mqtt
- WebSocket event handlers
- remote-repl logs in real-time
- Internet access through the Pico directly for connected devices (right now, devices have to reconnect to the base wifi network)
- Minification step to support app sizes >750K
- Create a new request
- (Send me any packs you make and I'll add them here)