
Find the best location to eat around campus
For students at the University of Florida who need to find food services close to them, the UFood is a website that shows students food options in their budget as well as their proximity. Unlike other sites, our product is catered toward UF students and will have a pleasant user experience free for all.
Frontend: Javascript, HTML, CSS, React JSBackend: Java, SpringBoot, Yelp API, REST APIDatabase: MySQLVersion Control: Git, GithubCI/CD: CircleCI
We are going to develop a CRUD Application:
Learn more here
| CRUD OPERATION | HTTP REQUEST METHOD |
|---|---|
| Create | POST |
| Read | GET |
| Update | PUT or PATCH |
| Delete | DELETE |

Project created using Javascript, Java, SpringBoot, and create-react-app. This application is structured in the following way:
u-food: contains all the code for the project (includes server and client side)-
client: contains frontend codepublic: contain all the statics files such as the website favicon and the main html file of the websitesrc: contains all the frontend codecomponents: contains all the components of the app. The components will be organized as follow.component-folder: contains all the files that are uniquely used by the component including other components. Components will be nested if they are only used by one component.
assets: contains all the assets of the project
__tests__: contains all the test for each component and functions
-
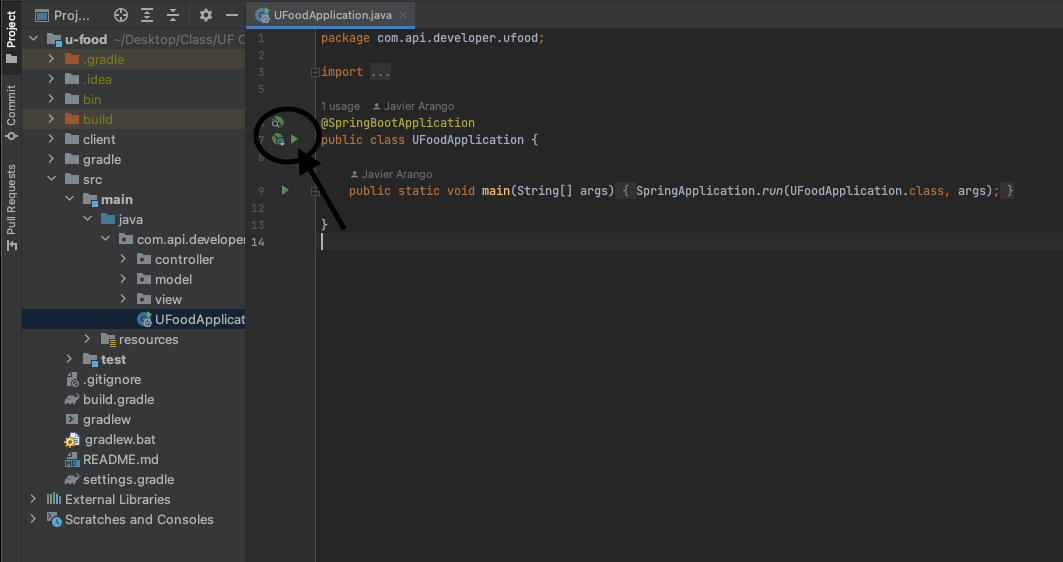
src: contains all the backend codemain: contains all the logic and server code (we using the MVC pattern)java/com/api/developer/ufood: contains the main codecontroller: controller acts on both model and view. It controls the data flow into model object and updates the view whenever data changes. It keeps view and model separate.model: dodel represents an object or JAVA POJO carrying data. It can also have logic to update controller if its data changes.view: view represents the visualization of the data that model contains.UFoodApplication: is the main file that will run the server. (Don't touch)
test: contains all the test filesjava/com/api/developer/ufood: contains the main code for testing (Please call a test file like this NameHere.Test.java
-
Run the backend server in go to http://localhost:8080/api/v1/swagger-ui/index.html
To run this project you will need Java, Gradle, and npm install in your system:
- Java:
Java 17 - Gradle: Latest version should be fine
- npm: I think you can use a ^16.0.0 version
Clone the repo to a folder of you're liking using the command prompt
git clone. Recommended code editor for frontend is Visual Studio Code
First you need to navigate to the client folder. Example for Mac cd client
In the project directory, you can run:
Runs the app in the development mode.
Open http://localhost:3000 to view it in your browser.
The page will reload when you make changes.
You may also see any lint errors in the console.
Launches the test runner in the interactive watch mode.
See the section about running tests for more information.
Clone the repo to a folder of you're liking using the command prompt
git clone. Recommended IDE for backend is IntelliJ
First you need to setup your IDE, so it can start running the server
- Check that you are running Java 17 in your IDE
- Go to
fileon the top left- Go to
Project Structure- Go to
Projectand make sure thatSDKis set to Java 17. If you don't have Java 17 you will need to install it - After setting Java 17, click
ApplyandOK
- Go to
- Go to

- After you are running Java 17 in the IDE, you need to set the run file
- First you need to build the project by either clicking on the
buildbutton or by going on the terminal and runninggradle build - After build is
BUILD SUCCESSFULyou do this to run the App: - Method 1
- Go to the
UFoodApplicationfile insidemain/java/com/api/developer/ufoodand run by clicking on thePlaygreen button next to the class name
- Go to the
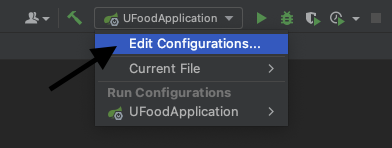
- Method 2
-
Set up the Run on the IDE
- Step 1 - Click on
Edit Configurationand it would open a menu
- Step 2 - Add a new configuration on the top left of the menu (Add
SpringBoot)

- Step 3 - Add everything like the one on the picture below

- Step 4 - Click
Applyand thenOK - Final step - Just run the app by clicking on the
Playgreen button on top
- Step 1 - Click on